Saturday, January 28, 2012

Valentine T-Shirt Tutorial


Ahhh...another holiday to create stuff for! Whoo hoo! :) I have so many plans...  Anyway, today's project, the first of my valentine projects, is this rhinestone and heat transfer t-shirt. I thought I would walk you through it. First I cut out my heat transfer material with my Silhouette Cameo. Today I used Silhouette brand smooth red heat transfer vinyl. I used the settings that my Cameo calls for for flocked vinyl. My Cameo seems to need the blade bumped up on almost everything I cut. Yours might be different so always do a test cut first.

I used 2 shapes in this project. The heat transfer is "heart_tree_C01483_23067". I loaded my media into my Cameo and cut it.

After it comes out of the machine, carefully peel away the material you are not using.
You are left with your heat transfer. Something you need to note, since the tree looks the same whether it is flipped as a mirror image or not, I DID NOT mirror image it in the software. If you had words or something similar, you will want to flip your image horizontally. You do this because you have to flip the image over when you iron it on. Very important!

I put the tree aside and next cut the rhinestone template. For this I used the shape "rhinestone_xoxo_C20091201142706_18816". I do not use the Silhouette rhinestone template material. This is not because I don't like it...I actually prefer it. It is thinner and peels right off the backing with the holes cut perfectly. Problem is, it's expensive compared to thicker rhinestone material that you can get online. This adds a step for me. I set my Cameo settings pretty high -- blade is set to 8. But the holes don't pull off the backing and I have to poke them out almost one by one. If you have the Silhouette rhinestone material you definitely want to use it! I'm cheap!

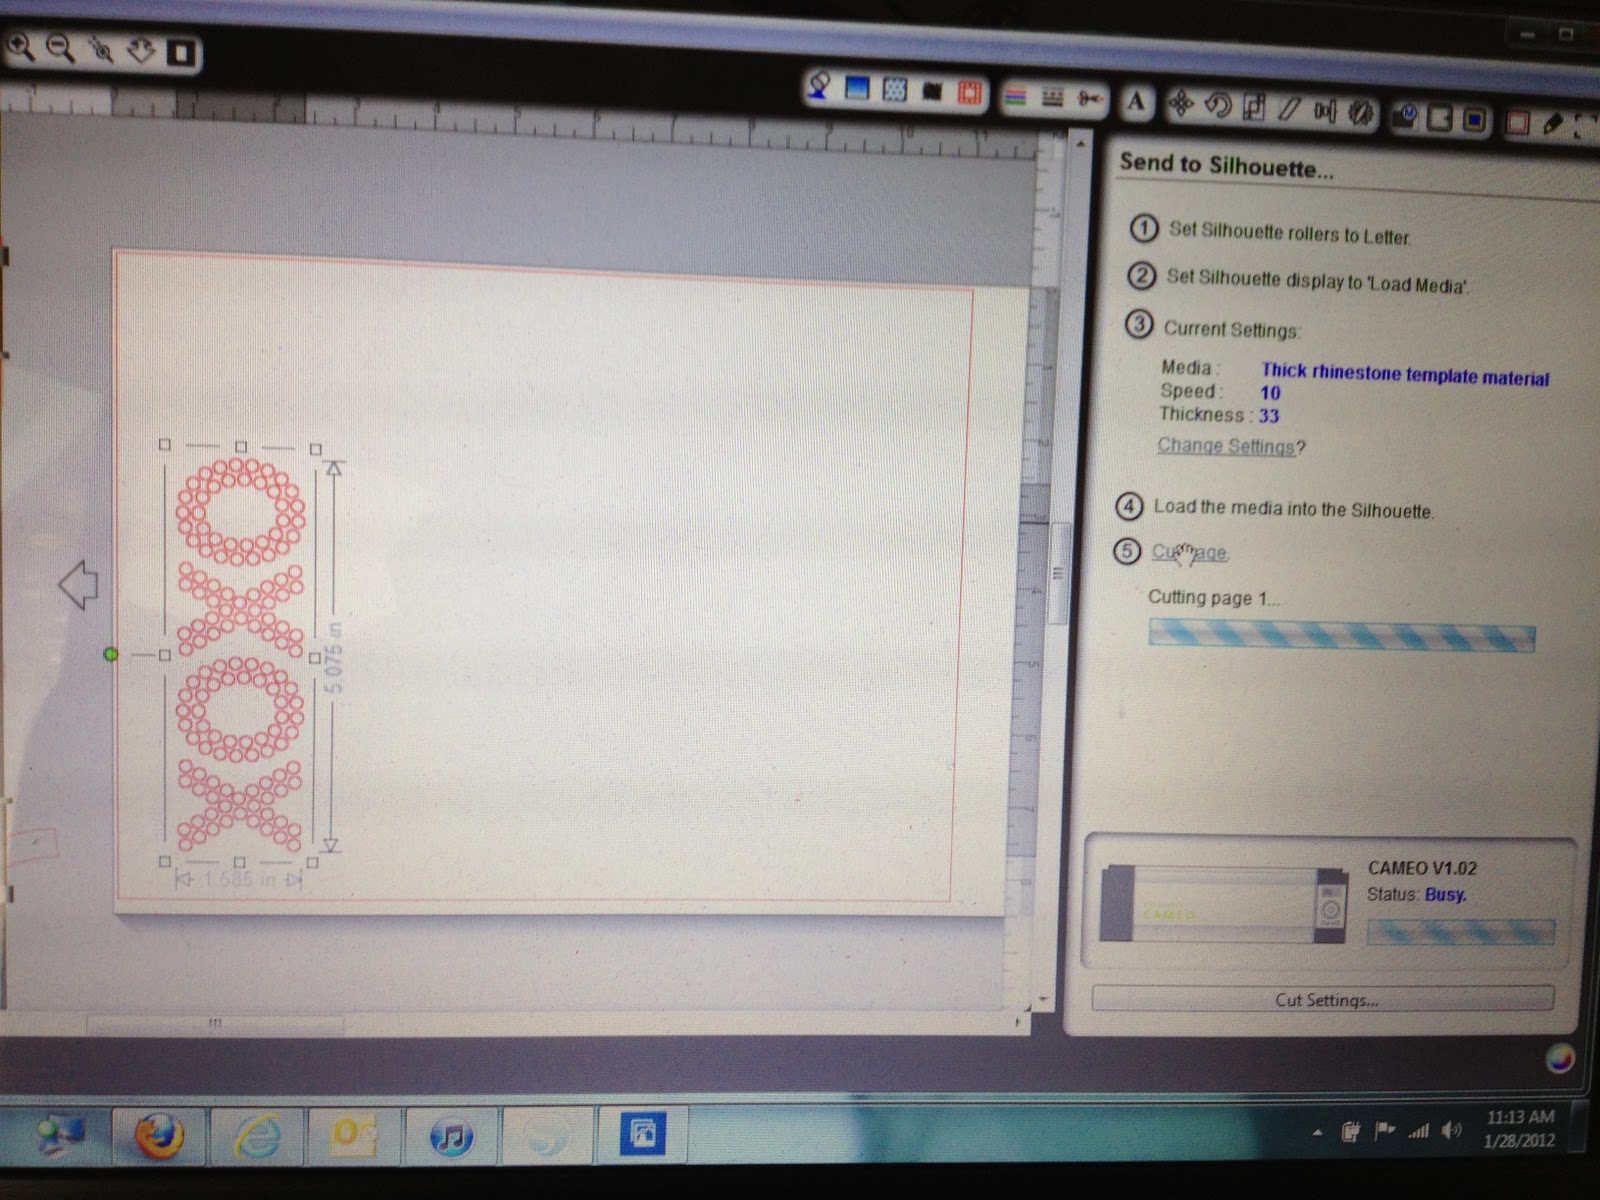
So load your media and cut your template material.
 When it comes out it looks kind of like this. I then have to punch most of those holes out. Not so with the Silhouette template material...
Then you place it on the backing board.
Next, sprinkle your rhinestones on the holes and move them into place with the brush. You will have to pick up the remaining rhinestones and place them into the holes.
When you are finished with the rhinestone placement it will look something like this.
Next you will place your rhinestone transfer paper over the rhinestones and carefully pull up the paper.
I wanted to make sure I had everything arranged the way I wanted it before I ironed it all down.
I placed the ironing paper over the design and pressed firmly with the iron for about 30 seconds in each spot until I had iron down the entire design.
Carefully pull off the transfer paper to reveal your design. You may need to re-iron stubborn spots.
So now we are finished with the heat transfer portion of the shirt. Onto the rhinestones...
You pretty much do the same thing you do with the heat transfer...place it where you want it on the t-shirt face-up. Press the iron firmly on the design for about 30-45 seconds. Slowly peel off the transfer paper to reveal your design. I added a few extra rhinestones to the tree for some added bling! :)
You are going to want to flip the shirt inside out and iron the back of the design to be sure it is on there good. Flip it back and you are finished! Ta da! :)
Next is treat boxes...stay tuned...

Thursday, January 26, 2012

Spanish Chicken and Rice

My mother-in-law had a friend who made the most amazing Spanish chicken and rice dish. Whenever she made it I raved about it. She wrote it down for me since she knew I loved it so much. Unfortunately, she passed away a few years ago but she still lives on in her delicious dish. I made it tonight and as always, enjoyed it immensely and ate too much!

First, dice up a whole large green bell pepper, a large sweet onion, a clove of garlic and one stalk of celery.
Heat a couple of tablespoons of olive oil in a large dutch oven and add the diced veggies. Saute the veggies for about 5 minutes, stirring frequently. Next add one cup of rice, a 14 oz can of diced tomatoes, a tablespoon of chicken base, a pinch of sazon goya, 1/3 jar of sofrito, 1/3 jar of recaito, 2 bay leaves and 1 1/2 cups of water.
Bring to a boil, then cover tightly and reduce heat for about 30 minutes, until rice has cooked through. When rice has finished cooking, add about 2 cups of shredded rotisserie chicken and about 10 sliced Spanish olives and heat through.
Serve with a salad! Yummy!!

Spanish Chicken and Rice

Ingredients
2 T olive oil
1 large green bell pepper, diced
1 large Spanish onion, diced
1 stalk of celery, diced
1 clove of garlic, chopped
2 bay leaves
1 cup rice
1/3 jar sofrito
1/3 jar recaito
14 oz can diced tomato
1 T chicken base
1 pinch sazon goya
1 1/2 cups water
Handful of Spanish olives, sliced
2 cups shredded rotisserie chicken

Directions
In a large Dutch oven heat olive oil. Add the vegetables and saute about 5 minutes until soft. Add rice, tomatoes, sofrito, recaito, chicken base, sazon goya, bay leaves and water. Bring to a boil and then cover tightly and reduce heat to simmer for about 30 minutes, or until rice is done. Then add the olives and chicken and heat through. Serve.

I hope you all enjoy this recipe as much as I do!

Monday, January 16, 2012

Super Quick Birthday Card

We were gone camping all weekend and between working all last week and getting ready for our camping trip, I had almost no time to make a card for my daughter's 8th birthday today. I don't even have her "real" present and it is 5:45! It is against all I believe in to go buy a card...especially one for my own child! So I very quickly whipped this up on my Silhouette. I added the ribbon and stamped the sentiment. I outlined the whole thing with a little glitter glue. Better than store bought any day! :)

Sunday, January 8, 2012

Homemade Morning Trail Mix

I am not a big breakfast eater. In fact, if I didn't get lightheaded from not eating, I would most likely skip breakfast every day. It's not that I don't want to eat or I'm trying to eat less or anything like that...I am just not hungry in the least. My stomach says I am, but my brain says, nope. I have to be at work before 7:15 and I must have coffee as soon as I wake up but I wouldn't attempt to eat that early...it would be a struggle to get anything down. I try to eat a little something around 9:30-10:00 but at school, it has to be quick and something I can eat at my desk in between teaching. I really like the Planters Daybreak Trail Mix but it is so expensive! So I decided to try making my own trail mix. I added about 2 cups of cashews (love them - but you could use any nut), one bag of dried cranberries, about a cup of chocolate chips, and a couple of handfuls of Kashi cluster-type cereal (you could use granola or any type of cluster or bran cereal) to a gallon zipper bag and mixed it all together. I then put a very large handful in about 10 snack bags and put them in the freezer. My new morning trail mix! Since I have to go to work tomorrow (boo!), I guess I'll try it out.

Friday, January 6, 2012

Stick Figures Welcome Sign

Today is my last weekday before I have to go back to work...boo! I made it very productive though. I finally cleaned out the refrigerator and freezer...there were some pretty gross things in there...yuck! But it's all nice and clean and organized now  :)  I also made another of the danishes, this time with raspberries. I had to have a small taste and it is really yummy (maybe even better than the blueberry)! I am now in the process of making a batch of Andes Creme de Menthe cookies too...I found a bag of the chips in the fridge so I figured, what the heck?

The crafting project is what I'm highlighting here. I have Christmas and Valentines and Easter and 4th of July and Halloween and Fall hangings for my front door. Well what about for the rest of the year? I was inspired by the little stick figures that everyone has on the back of their SUVs or minivans -- not me because I have neither of those vehicles! But I think they're cute and thought they would make a really cool front door plaque. Soooo I bought a cheap wooden plaque from Michaels for $2.99 and acrylic paint for $1. I put 2-3 coats of paint on the plaque.
So now for the stick figures. The Silhouette online store has stick figures! Whoo hoo! People, pets, babies, all kinds of stuff. So I bought the ones I wanted (99 cents each...can't beat that) and cut them out of white vinyl from Expressions Vinyl, along with a welcome sign.
I loaded the vinyl into my Silhouette and customized my cut settings as you see below in the photo.

After I cut out my designs I needed to weed out the parts that I did not use. I did this using the weeding tool.

Next I applied the transfer tape to my design using the scraping tool.
I then carefully lifted the design off the backing.
Next is to decide where to put the design on the plaque. After placing it where I wanted it, I used the scraper tool to adhere it as best I could.
Then I VERY carefully peeled up the transfer paper, pulling the design onto the plaque with the scraper tool as I went along.
Since I am hanging it on my front door I needed to add a ribbon to hang it with. I had some leftover hardware from IKEA and used some bronze ric rack ribbon to adhere to the plaque.
Cute, huh? But it needed something. So I painted part of the edges white, added some rhinestone stickers and wa-la...perfection!
I sprayed it with Krylon's Preserve It and hung it on the front door. I didn't include a picture of it on the door because the whole front of our house is getting prepped for paint and it, along with the front door, are not picture-worthy at this time! :-)

Thursday, January 5, 2012

Vinyl Wall Art

I've had these pictures in these frames for years. In our old house they went along hallways. Here in this house, because it is much smaller, I made a photo collage wall. But all that was there were the photos...which is nice...but I felt it needed something more. Enter my Silhouette Cameo. I love that this machine can do so many different things. You've seen posts of the shirts I've made, the ornaments, the menu board, the gift boxes...there are so many amazing things you can do. I can't wait to help my kids make valentines for their classmates! Anyway, back to the photo wall. I decided to cut out my own vinyl wall art. Purchasing it is , a) expensive, b) you're limited to whatever THEY have come up with, and c) impersonal. I browsed the Silhouette online store and found a couple of things that I thought would work great. What I really wanted to do was a family definition. So I made my own. It was beautiful. One problem...it was very intricate with small words. I have satin paint on orange-peel textured walls. That and intricately detailed vinyl art DO NOT MIX! It's unfortunate because it was really cute. So I cut the shapes, "moments" and "phrase: families are forever". I love how they look with the photos on the wall.

Wednesday, January 4, 2012

Chalkboard Vinyl Menu Board

I love being off from work! Especially when I'm not rushing around getting ready for the holidays or entertaining family. It's been nice having this week off from work after the holidays when many of the neighboring counties went back to school this week. Sad for them. So I've had time to cook and bake and create. Yesterday I made the chalkboard vinyl menu board I have been planning on for weeks. I love the way it turned out!!
I started with chalkboard vinyl and white vinyl from Expressions Vinyl. On my Silhouette Cameo, I cut 12 inches by about 18 inches of the chalkboard vinyl using "scalloped shapes" from the Silhouette online store. When you resize it wants to constrain the shape so in your Silhouette software under Object, Transform, Scale Options, make sure Lock Aspect Ratio is not checked. Then you can resize your shape however you wish. Next I used the "today's menu," "menu board letters" and "chef's hat" shapes and cut them out of white vinyl. I adhered the chalkboard vinyl to the side of my pantry cabinet and then arranged the white vinyl on top. Using the chalkboard marker from Expressions Vinyl, I wrote in this week's menu. The marker erases with a wet cloth. I posted it on Facebook for my friends and one said that I am so organized. Yeah, come to my house and see what I didn't take pictures of...    :)

Tuesday, January 3, 2012

Blueberry Cream Cheese Danish

I LOVE DANISH!! There. It is my favorite "dessert." I like cookies and pies and cakes, but Danish holds a special place in my heart (and my stomach!). I don't buy it too often because I will eat it all. By myself.  So if I feel the need I will occasionally purchase a single danish pocket from the Publix bakery. I have been known to get two thinking I'll save the other for another day. No. Which is the reason I don't buy a whole one!! So I found this recipe on Pinterest from Lauren's Latest. If you've never visited her blog, do it...awesome! I thought I would try it...with a few modifications of course. Mine is called Blueberry Cream Cheese Danish for a reason -- it uses blueberries instead of blackberries. They were on sale and I love blueberries!
I started with reduced fat crescent rolls and rolled them into a rectangle that just about fit my baking stone.

I then rolled it out to seal all of the cracks. In a bowl I combined 8 oz softened 1/3 less fat cream cheese (I left mine out on the counter for an hour or so), 1/2 cup sugar, 3 T flour, and 1 tsp vanilla.


I cut 1 inch diagonal cuts in the sides of the crescent roll and then added the cream cheese mixture down the middle. I added about 1 cup of fresh blueberries on top of the cream cheese mixture and then overlapped the crescent roll cuts.
I baked it in a 375 oven for about 18 minutes, until the top browned.

I let it cool completely. Now for the glaze...I mixed 1/2 cup powdered sugar with 1/8 tsp vanilla and somewhere between 2-4 tablespoons of heavy cream. I would start with 2 and add more to get it to the consistency of a glaze. I then drizzled it all over the top of the danish.

Looks good huh?? Tastes good too :)  REALLY good!
This was super easy so I don't see why I would have to go to Publix any more to buy theirs! I made mine a little lower fat too! :)  You really could modify this any way you like -- add the type of fruit you like, or add walnuts and make a glaze using maple syrup...endless possibilities!  Enjoy!

Suzanne's Blueberry Cream Cheese Danish
(printable recipe)

1 tube reduced-fat crescent rolls
8 oz 1/3 less fat cream cheese, softened
1/2 cup sugar
1 tsp vanilla extract
3 T flour
1 cup fresh blueberries


Glaze:
1/2 cup powdered sugar
1/8 tsp vanilla extract
2-4 T heavy cream


Preheat oven to 375 degrees. In a small bowl combine cream cheese, sugar, flour and vanilla. Set aside. Open crescent rolls. Lay the rolls out as they are on a baking sheet or stone and roll out to about 1/4 inch thickness, sealing all seams. Cut 1-inch diagonal strips up the sides of the dough leaving about 3 inches of uncut dough down the middle. Spread cream cheese mixture down the center of the dough. Top with blueberries. Fold the dough up over the top of the mixture. Bake for about 18 minutes or until top is lightly browned. Cool completely. Transfer to a serving plate. In a small bowl mix the ingredients for the glaze. Start with 2 T of heavy cream and add more to the desired consistency. Drizzle over the top of the danish. Cut and serve.