Showing posts with label Silhouette Cameo. Show all posts

Saturday, June 16, 2012

Father's Day Gifts

I spent the entire morning making Father's Day gifts. Well, actually, only one thing was a gift for my husband and the other two things were more of a tribute to him.

This is the basket of goodies I made for the hubby. I bought a black metal bin on clearance at Target and put socks, underwear, K-cups, Clif Bars and razor blade refills (those darn things are so expensive!) in it. On the bin itself I cut the vinyl word "Daddy" on my Silhouette (shape "Daddy title" from the online store) and adhered it to the bin. THAT was the easy gift!! I think he'll love it!

A few days ago I saw a post on the Silhouette blog for the cutest darn heat transfer t-shirt for a daughter to wear to honor her daddy on Father's Day. Being that I have two daughters I thought this was a super idea...hence the tribute project. This was not as easy as I thought it would be. First of all, I was using dark printable heat transfer and the tutorial is for light -- two TOTALLY different things. I know...strange. One you mirror image and the other you don't. I didn't actually screw that part up but I did have to think about it a little harder! Second, intricate designs are NOT compatible with dark printable heat transfer. Well, maybe for some people they are, but I am not one of those people! So I modified my image somewhat. If you are looking to do the same type of project, follow the tutorial but DON'T mirror the image. Aside from that, I pretty much did the same thing for my t-shirts. The design is from the Silhouette online store - "dad heart frame" - and I cut away the more intricate part of the design and this was the end result.

The kids love them and I think he will be so happy when he sees the girls in their shirts!
Happy Father's Day! :)

Friday, June 8, 2012

I'm Baaacccckkkk! And I have a new Silhouette project to share!

My last day of school was Wednesday! Words cannot express the happiness I feel about not having to work for the next 9 weeks!! My summer list is usually long...cleaning out closets, cleaning out cabinets, touching up painting in the house, etc...but I have lots of time to just chill out and recharge.  I really need it after this school year!! I am really looking forward to cooking and baking and creating. And of course going to the beach, going to to the water park, going to the movies and bowling. Life is good!

It has been baby central at work this year. I think 7 teachers had or will have babies at some point over this last year. Despite my end-of-year craziness, I was able to make something special for one young lady who is due at the end of July. I LOVE the cute little onsies I have seen on Pinterest. I made some of the ideas my own for this gift. All of them were cut on my Silhouette. I know the picture doesn't show the colors that well (it was 10:00 at night) but they are green, blue and black designs. I am so pleased with how they turned out! The first onesie is just two fonts cut on my machine -- Arial and Baby Huffy -- cut on blue and green flocked heat transfer from Expressions Vinyl. The second is the design "assorted moustache set" from the Silhouette online store, cut on regular black heat transfer also from Expressions Vinyl, and the third is the design "neck ties," cut on green flocked heat transfer. She loved them! :)

So I packaged them up into a little gift basket with a few other necessities and Wa-La...

Have a great Friday!!

Saturday, January 28, 2012

Valentine T-Shirt Tutorial


Ahhh...another holiday to create stuff for! Whoo hoo! :) I have so many plans...  Anyway, today's project, the first of my valentine projects, is this rhinestone and heat transfer t-shirt. I thought I would walk you through it. First I cut out my heat transfer material with my Silhouette Cameo. Today I used Silhouette brand smooth red heat transfer vinyl. I used the settings that my Cameo calls for for flocked vinyl. My Cameo seems to need the blade bumped up on almost everything I cut. Yours might be different so always do a test cut first.

I used 2 shapes in this project. The heat transfer is "heart_tree_C01483_23067". I loaded my media into my Cameo and cut it.

After it comes out of the machine, carefully peel away the material you are not using.
You are left with your heat transfer. Something you need to note, since the tree looks the same whether it is flipped as a mirror image or not, I DID NOT mirror image it in the software. If you had words or something similar, you will want to flip your image horizontally. You do this because you have to flip the image over when you iron it on. Very important!

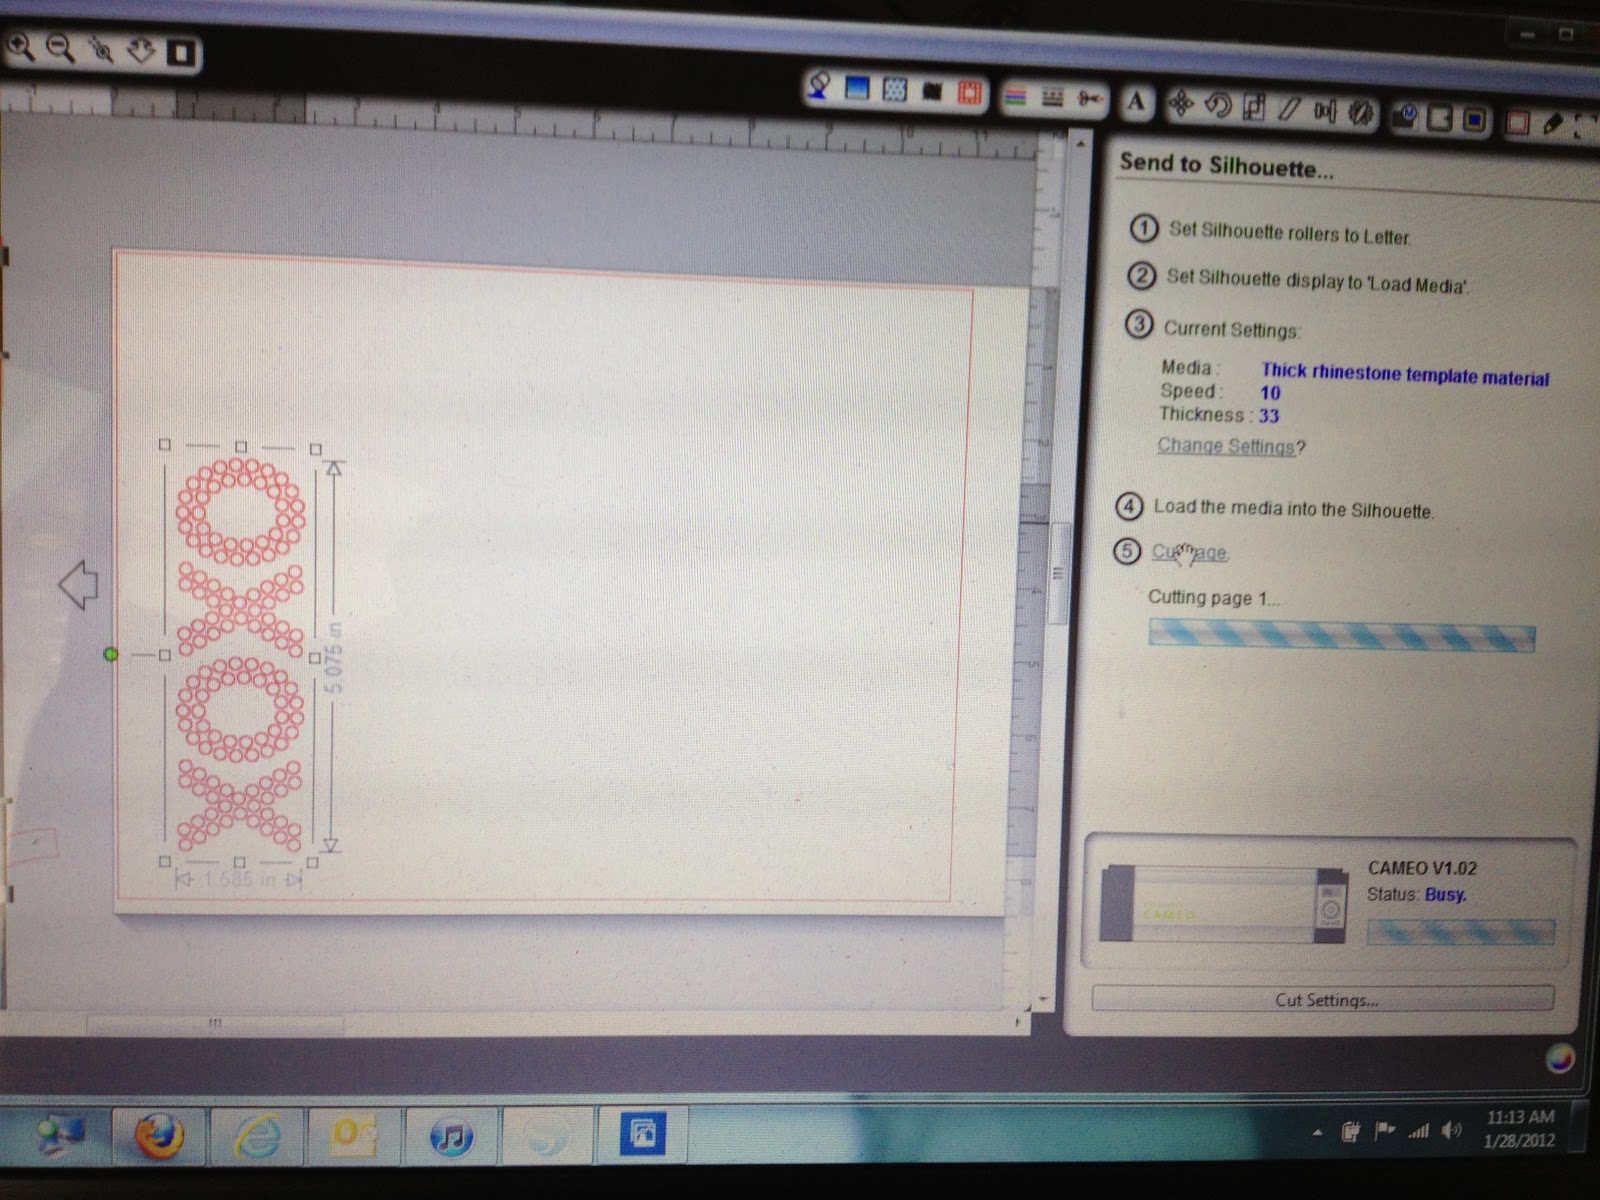
I put the tree aside and next cut the rhinestone template. For this I used the shape "rhinestone_xoxo_C20091201142706_18816". I do not use the Silhouette rhinestone template material. This is not because I don't like it...I actually prefer it. It is thinner and peels right off the backing with the holes cut perfectly. Problem is, it's expensive compared to thicker rhinestone material that you can get online. This adds a step for me. I set my Cameo settings pretty high -- blade is set to 8. But the holes don't pull off the backing and I have to poke them out almost one by one. If you have the Silhouette rhinestone material you definitely want to use it! I'm cheap!

So load your media and cut your template material.
 When it comes out it looks kind of like this. I then have to punch most of those holes out. Not so with the Silhouette template material...
Then you place it on the backing board.
Next, sprinkle your rhinestones on the holes and move them into place with the brush. You will have to pick up the remaining rhinestones and place them into the holes.
When you are finished with the rhinestone placement it will look something like this.
Next you will place your rhinestone transfer paper over the rhinestones and carefully pull up the paper.
I wanted to make sure I had everything arranged the way I wanted it before I ironed it all down.
I placed the ironing paper over the design and pressed firmly with the iron for about 30 seconds in each spot until I had iron down the entire design.
Carefully pull off the transfer paper to reveal your design. You may need to re-iron stubborn spots.
So now we are finished with the heat transfer portion of the shirt. Onto the rhinestones...
You pretty much do the same thing you do with the heat transfer...place it where you want it on the t-shirt face-up. Press the iron firmly on the design for about 30-45 seconds. Slowly peel off the transfer paper to reveal your design. I added a few extra rhinestones to the tree for some added bling! :)
You are going to want to flip the shirt inside out and iron the back of the design to be sure it is on there good. Flip it back and you are finished! Ta da! :)
Next is treat boxes...stay tuned...

Monday, January 16, 2012

Super Quick Birthday Card

We were gone camping all weekend and between working all last week and getting ready for our camping trip, I had almost no time to make a card for my daughter's 8th birthday today. I don't even have her "real" present and it is 5:45! It is against all I believe in to go buy a card...especially one for my own child! So I very quickly whipped this up on my Silhouette. I added the ribbon and stamped the sentiment. I outlined the whole thing with a little glitter glue. Better than store bought any day! :)

Friday, January 6, 2012

Stick Figures Welcome Sign

Today is my last weekday before I have to go back to work...boo! I made it very productive though. I finally cleaned out the refrigerator and freezer...there were some pretty gross things in there...yuck! But it's all nice and clean and organized now  :)  I also made another of the danishes, this time with raspberries. I had to have a small taste and it is really yummy (maybe even better than the blueberry)! I am now in the process of making a batch of Andes Creme de Menthe cookies too...I found a bag of the chips in the fridge so I figured, what the heck?

The crafting project is what I'm highlighting here. I have Christmas and Valentines and Easter and 4th of July and Halloween and Fall hangings for my front door. Well what about for the rest of the year? I was inspired by the little stick figures that everyone has on the back of their SUVs or minivans -- not me because I have neither of those vehicles! But I think they're cute and thought they would make a really cool front door plaque. Soooo I bought a cheap wooden plaque from Michaels for $2.99 and acrylic paint for $1. I put 2-3 coats of paint on the plaque.
So now for the stick figures. The Silhouette online store has stick figures! Whoo hoo! People, pets, babies, all kinds of stuff. So I bought the ones I wanted (99 cents each...can't beat that) and cut them out of white vinyl from Expressions Vinyl, along with a welcome sign.
I loaded the vinyl into my Silhouette and customized my cut settings as you see below in the photo.

After I cut out my designs I needed to weed out the parts that I did not use. I did this using the weeding tool.

Next I applied the transfer tape to my design using the scraping tool.
I then carefully lifted the design off the backing.
Next is to decide where to put the design on the plaque. After placing it where I wanted it, I used the scraper tool to adhere it as best I could.
Then I VERY carefully peeled up the transfer paper, pulling the design onto the plaque with the scraper tool as I went along.
Since I am hanging it on my front door I needed to add a ribbon to hang it with. I had some leftover hardware from IKEA and used some bronze ric rack ribbon to adhere to the plaque.
Cute, huh? But it needed something. So I painted part of the edges white, added some rhinestone stickers and wa-la...perfection!
I sprayed it with Krylon's Preserve It and hung it on the front door. I didn't include a picture of it on the door because the whole front of our house is getting prepped for paint and it, along with the front door, are not picture-worthy at this time! :-)

Thursday, January 5, 2012

Vinyl Wall Art

I've had these pictures in these frames for years. In our old house they went along hallways. Here in this house, because it is much smaller, I made a photo collage wall. But all that was there were the photos...which is nice...but I felt it needed something more. Enter my Silhouette Cameo. I love that this machine can do so many different things. You've seen posts of the shirts I've made, the ornaments, the menu board, the gift boxes...there are so many amazing things you can do. I can't wait to help my kids make valentines for their classmates! Anyway, back to the photo wall. I decided to cut out my own vinyl wall art. Purchasing it is , a) expensive, b) you're limited to whatever THEY have come up with, and c) impersonal. I browsed the Silhouette online store and found a couple of things that I thought would work great. What I really wanted to do was a family definition. So I made my own. It was beautiful. One problem...it was very intricate with small words. I have satin paint on orange-peel textured walls. That and intricately detailed vinyl art DO NOT MIX! It's unfortunate because it was really cute. So I cut the shapes, "moments" and "phrase: families are forever". I love how they look with the photos on the wall.

Wednesday, January 4, 2012

Chalkboard Vinyl Menu Board

I love being off from work! Especially when I'm not rushing around getting ready for the holidays or entertaining family. It's been nice having this week off from work after the holidays when many of the neighboring counties went back to school this week. Sad for them. So I've had time to cook and bake and create. Yesterday I made the chalkboard vinyl menu board I have been planning on for weeks. I love the way it turned out!!
I started with chalkboard vinyl and white vinyl from Expressions Vinyl. On my Silhouette Cameo, I cut 12 inches by about 18 inches of the chalkboard vinyl using "scalloped shapes" from the Silhouette online store. When you resize it wants to constrain the shape so in your Silhouette software under Object, Transform, Scale Options, make sure Lock Aspect Ratio is not checked. Then you can resize your shape however you wish. Next I used the "today's menu," "menu board letters" and "chef's hat" shapes and cut them out of white vinyl. I adhered the chalkboard vinyl to the side of my pantry cabinet and then arranged the white vinyl on top. Using the chalkboard marker from Expressions Vinyl, I wrote in this week's menu. The marker erases with a wet cloth. I posted it on Facebook for my friends and one said that I am so organized. Yeah, come to my house and see what I didn't take pictures of...    :)

Thursday, December 29, 2011

Yes I'm Still Here...

I hope everyone had a wonderful holiday. We had a great Christmas with family and friends. I am so blessed to have such a wonderful life and Christmas is such a great time to reflect on what is really important.

Like most people, I am trying to get more organized for the new year and get things done that need getting done before I go back to work. Half the school year is over and I always tackle projects during my winter break as well as my summer break. Winter break to-do list: Clean out pantry, check; Clean out a new space for my new Keurig and all of my coffee supplies, check; Finish re-doing my daughter's room, half-check; Find a place for my winter clothes, not yet; and clean out the refrigerator, not yet. So I am about halfway there. Good thing I don't have to be back to work until the 9th! :-)


My kids got a Kindle Fire from Grandma and I personalized it for them using my Silhouette Cameo, cutting their names out of vinyl to stick on the backs. Lucky kids!

Happy Thursday everyone!

Saturday, December 17, 2011

Miscellaneous Christmas Decorations...

Let's see...what have I done this week? We finished our secret pal week with a bang on Friday. Here is one thing I made for my friend.

I love etching! So elegant!

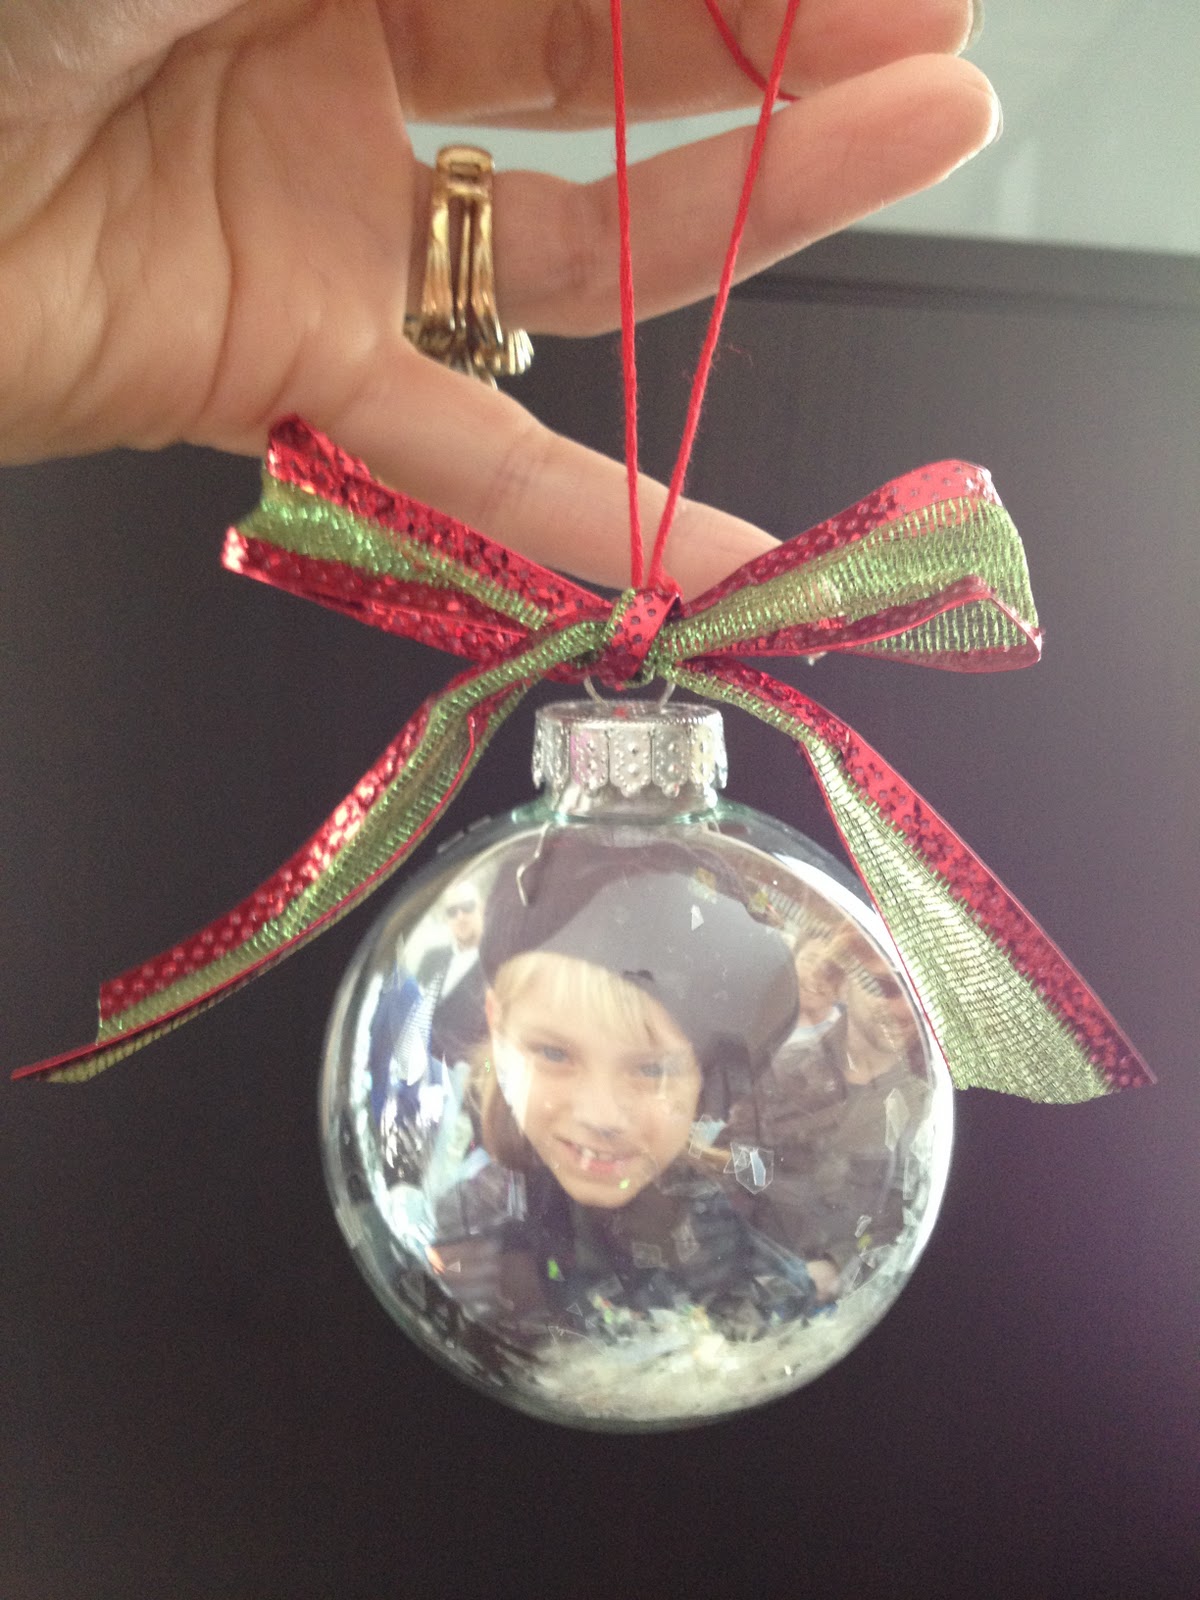
Today I worked on some more really cute ornaments for both my tree and to give to my mother-in-law for her tree. I used the clear ornament cut from Lori Whitlock for her nativity ornament idea. But instead I used the cut to cut out pictures of my kids that would fit right into the ornament. I printed the photos on my printer and then lined them up on my Silhouette cutting mat to cut their faces out in the shape of the ornament. I must say it worked out great! I cut 2 copies and then glued them together in case the ornament should rotate...their faces are on both sides of the ornaments. I then rolled it up and inserted it into the ornament and then flattened it back out using a pen that I stuck inside the ornament. I added crafting "snow" and a ribbon and wa-la! I made one of each girl for me and for my mother-in-law...I think she'll love them! :-)

Lastly, I thought I would share my idea for hanging my holiday cards. I live in a very small house so I have to be creative. I hang ribbon around a door frame using the Command picture hanging strips and then I paperclip the cards to the ribbon. It's cheap and very effective. And I must say I think it looks great!


I don't know what else I'll be making...time is getting short and I'm getting tired! Three more days of work and then off for 2 1/2 weeks...can't wait!!!